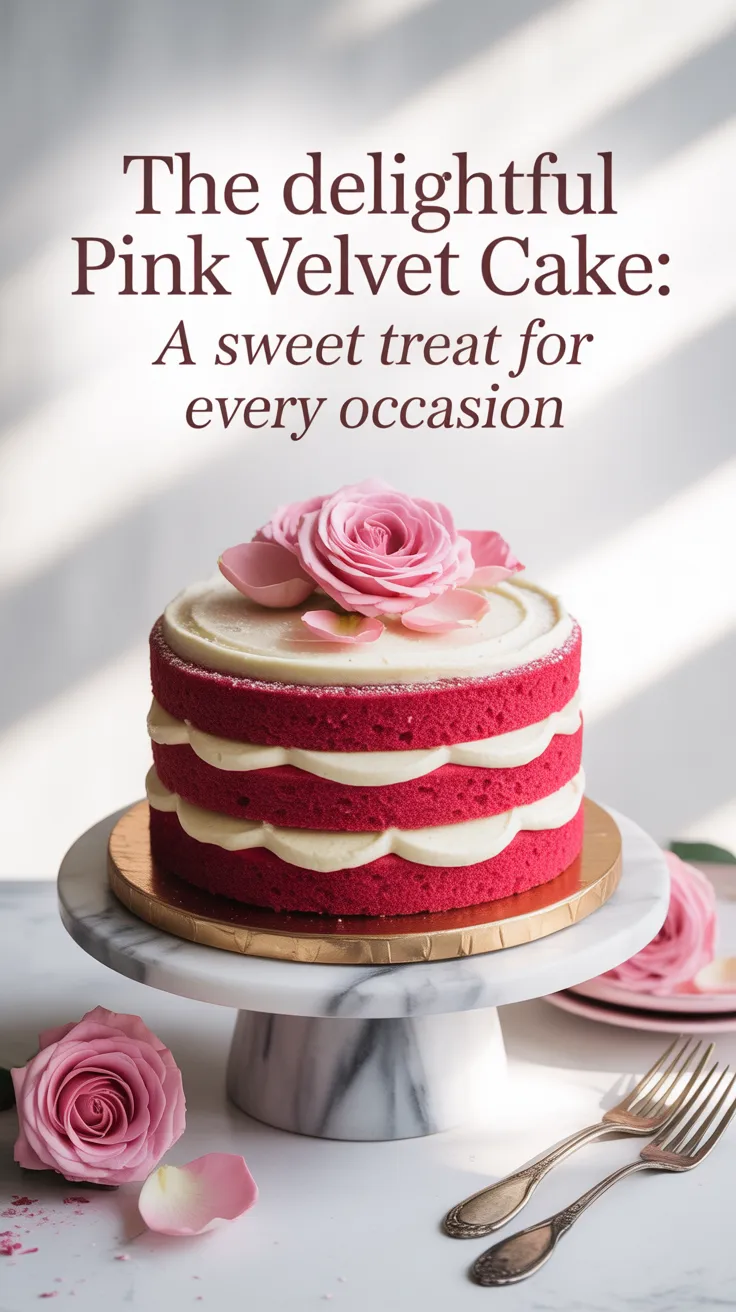
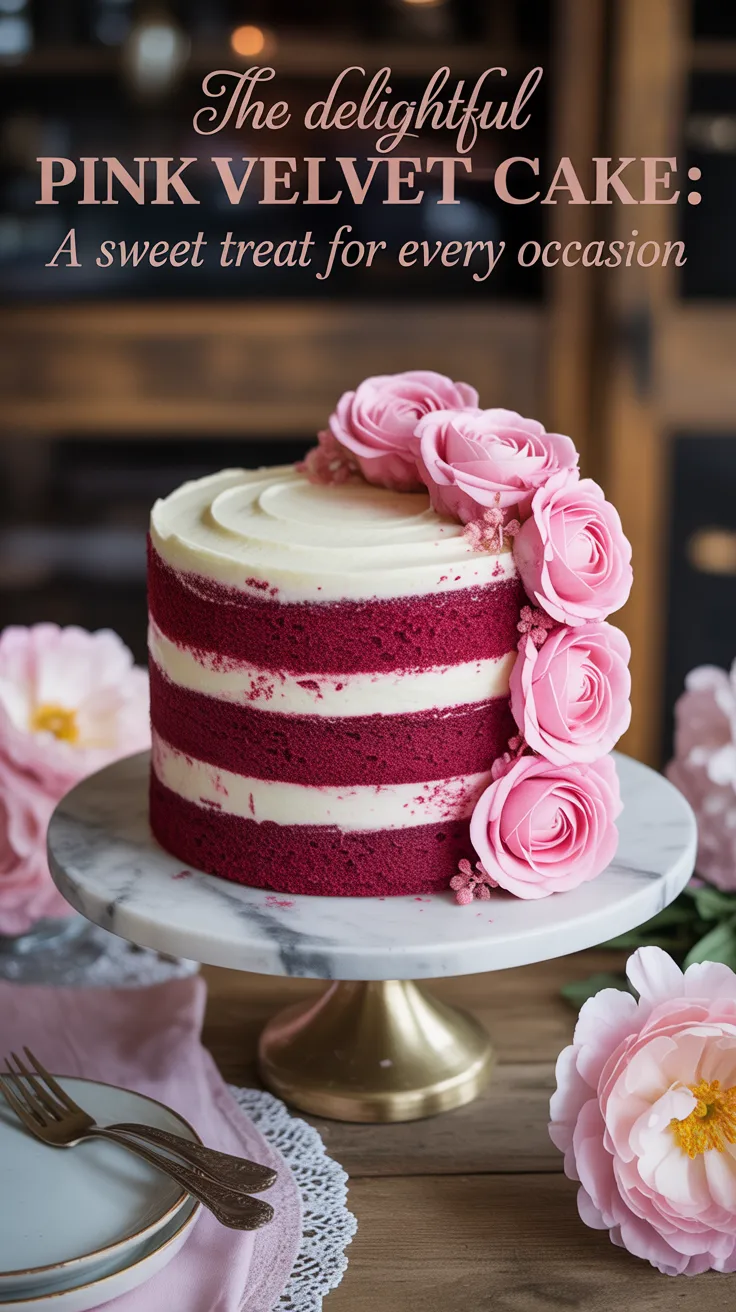
Imagine yourself in a cozy kitchen, surrounded by the sweet aroma of freshly baked goods. The oven is humming softly, and the countertops are covered in a rainbow of ingredients. In the midst of this scene, you spot a beautiful pink velvet cake, its layers stacked high and frosted with a creamy icing. This delectable dessert is a favorite in my family, loved for its moist texture, vibrant color, and irresistible flavor.
The History and Origins of Pink Velvet Cake
While red velvet cake is a well-known classic, pink velvet cake offers a fun and whimsical twist on the traditional recipe. The origins of pink velvet cake are somewhat murky, but many believe it was inspired by the popularity of red velvet cake and the desire to create a more feminine and playful version. The addition of pink food coloring gives this cake its signature hue, while the buttermilk and vinegar in the batter provide a tangy flavor and tender crumb.
Why You Should Make Pink Velvet Cake
- It’s a visually stunning dessert that will impress your guests at any gathering.
- The moist and tender crumb of the cake is sure to delight your taste buds.
- The creamy icing adds a luscious finishing touch to this decadent treat.
Ingredients:
- 2 1/2 cups all-purpose flour – provides structure and texture to the cake.
- 1 1/2 cups granulated sugar – adds sweetness to the batter.
- 1 teaspoon baking soda – helps the cake rise in the oven.
- 1 teaspoon salt – enhances the flavor of the cake.
- 1 cup buttermilk – adds moisture and tanginess to the batter.
- 1/2 cup vegetable oil – keeps the cake moist and tender.
- 2 large eggs – bind the ingredients together and add structure to the cake.
- 1 tablespoon white vinegar – reacts with the baking soda to help the cake rise.
- 1 teaspoon vanilla extract – adds flavor to the cake.
- Pink food coloring – gives the cake its vibrant color.
Preparing the Ingredients:
Before you begin making the pink velvet cake, make sure all your ingredients are at room temperature. This will help them blend together smoothly and evenly in the batter. Measure out all your ingredients accurately to ensure the best results.
Cutting Techniques:
When cutting the cake layers, use a long, serrated knife to ensure clean and even slices. Take your time and use a gentle sawing motion to prevent the cake from crumbling or tearing.
Kitchen Tools Required:
To make pink velvet cake, you will need the following kitchen tools:
- Mixing bowls – for combining the dry and wet ingredients.
- Electric mixer – for beating the batter until smooth and fluffy.
- Measuring cups and spoons – for accurately measuring out ingredients.
- Cake pans – for baking the cake layers.
- Cooling rack – for cooling the cake layers before frosting.
Temperature and Timing Guide:
Preheat your oven to 350°F (180°C) and bake the cake layers for 25-30 minutes, or until a toothpick inserted into the center comes out clean. Allow the cake layers to cool completely before frosting.
Common Issues and Solutions:
- If your cake layers are domed on top, use a serrated knife to level them before assembling the cake.
- If the cake is too dense, you may have overmixed the batter. Be sure to mix just until the ingredients are combined.
- If the frosting is too thin, add more powdered sugar. If it’s too thick, add a splash of milk to thin it out.
Instructions:
Step 1: Prepare the Cake Batter
In a mixing bowl, whisk together the flour, sugar, baking soda, and salt. In a separate bowl, combine the buttermilk, vegetable oil, eggs, vinegar, and vanilla extract. Gradually add the wet ingredients to the dry ingredients, mixing until just combined. Stir in the pink food coloring until the desired shade is reached.
Step 2: Bake the Cake Layers
Divide the batter evenly between three greased and floured cake pans. Bake in the preheated oven for 25-30 minutes, or until a toothpick inserted into the center comes out clean. Allow the cake layers to cool in the pans for 10 minutes, then transfer them to a wire rack to cool completely.
Step 3: Frost the Cake
Once the cake layers are completely cooled, frost each layer with a generous amount of cream cheese frosting. Stack the layers on top of each other, spreading frosting between each layer. Use the remaining frosting to cover the top and sides of the cake.
Step 4: Serve and Enjoy
Slice the pink velvet cake into generous portions and serve to your family and friends. Enjoy the moist and flavorful cake with its creamy icing, and savor every bite of this delightful treat.
Tips for Perfect Results:
- Be sure to use gel food coloring for a vibrant pink hue that won’t fade during baking.
- Allow the cake layers to cool completely before frosting to prevent the icing from melting.
- Store any leftover cake in an airtight container in the refrigerator for up to three days.

Alternative Ways to Customize the Recipe
If you’d like to put your own spin on the classic pink velvet cake, consider these alternative options:
- Swap out the cream cheese frosting for a fluffy buttercream or whipped cream frosting.
- Add sprinkles or edible glitter to the top of the cake for a festive touch.
- Experiment with different flavors of extract, such as almond or lemon, to change up the taste of the cake.
Final Thoughts
Whether you’re celebrating a special occasion or simply craving a sweet treat, pink velvet cake is the perfect choice to elevate any gathering. Its playful color and delightful flavor make it an instant showstopper that will leave a lasting impression on your guests. The combination of moist layers and creamy frosting creates a delightful experience with every bite.
This versatile cake is not only a feast for the eyes but also a canvas for your creativity, allowing you to customize it to fit any theme or occasion. From birthday celebrations to afternoon tea, this delightful treat is bound to bring joy and sweetness to your table. So gather your loved ones, create some beautiful memories, and enjoy each decadent slice of this charming pink velvet cake. Happy baking!