Imagine yourself in a cozy kitchen, the aroma of freshly brewed espresso filling the air, and the sound of a mixer whirring as you prepare to make a decadent dessert. This is the setting where the Espresso Chocolate Marble Cheesecake was originally created – a dessert that has become a favorite in my family for special occasions and gatherings.
Why My Family Loves This Treat
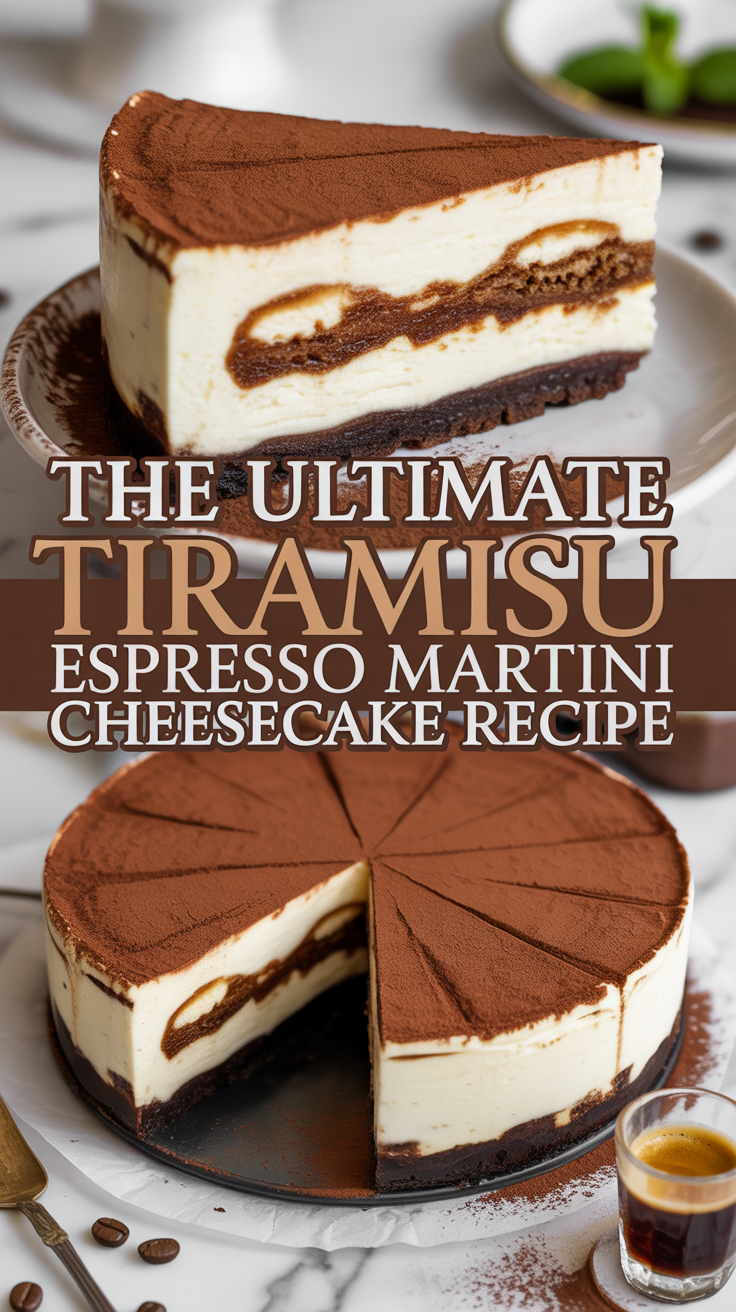
My family loves this treat for its rich and creamy texture, the perfect balance of espresso and chocolate flavors, and the beautiful marble swirls that make it a visually stunning dessert. It has become a tradition to make this cheesecake for birthdays, holidays, and any time we want to indulge in a truly special dessert.
The History and Origins of the Dish
The Espresso Chocolate Marble Cheesecake is a modern twist on the classic cheesecake, combining the rich flavors of espresso and chocolate in a creamy and decadent dessert. While the exact origins of this recipe are unclear, it is believed to have been inspired by the popular marble cake, with a cheesecake twist.
Reasons Why You Should Make This Dish
- Impress your guests with a visually stunning dessert
- Indulge in a rich and creamy treat that combines the flavors of espresso and chocolate
- Create a special dessert for birthdays, holidays, or any occasion

Ingredients:
- For the crust:
- 1 1/2 cups graham cracker crumbs
- 1/4 cup sugar
- 1/2 cup melted butter
- For the filling:
- 24 oz cream cheese, softened
- 1 cup sugar
- 3 eggs
- 1 tsp vanilla extract
- 1/4 cup espresso, cooled
- 1/2 cup chocolate chips, melted
Preparing the Ingredients:
Before you begin making the Espresso Chocolate Marble Cheesecake, make sure all your ingredients are at room temperature for the best results. This will ensure that the cream cheese mixes smoothly and evenly, creating a creamy and luscious filling.
Cutting Techniques:
When cutting the cheesecake, use a sharp knife dipped in hot water to create clean and neat slices. This will prevent the cheesecake from sticking to the knife and ensure that each slice looks as beautiful as it tastes.
Kitchen Tools Required:
- Mixer – for mixing the cream cheese and sugar until smooth
- Springform pan – for baking the cheesecake and creating a beautiful presentation
- Baking sheet – to catch any drips or spills while baking
Temperature and Timing Guide:
Preheat your oven to 325°F and bake the cheesecake for 45-50 minutes, or until the center is set but still slightly jiggly. Allow the cheesecake to cool completely before refrigerating for at least 4 hours, or overnight, to set.
Common Issues and Solutions:
- If your cheesecake cracks while baking, don’t worry! Simply cover it with a layer of whipped cream or ganache to hide any imperfections.
- If your cheesecake is overbaked and becomes dry, serve it with a dollop of whipped cream or a drizzle of chocolate sauce to add moisture and flavor.

Instructions:
Step 1: Prepare the Crust
In a bowl, mix graham cracker crumbs, sugar, and melted butter until well combined. Press the mixture into the bottom of a springform pan to form the crust.
Step 2: Make the Filling
In a mixer, beat cream cheese and sugar until smooth. Add eggs one at a time, mixing well after each addition. Stir in vanilla extract. Divide the batter in half and mix espresso into one half and melted chocolate into the other half.
Step 3: Create the Marble Effect
Alternate spoonfuls of the espresso and chocolate batter into the prepared crust. Use a knife to swirl the batters together to create a marble effect.
Step 4: Bake and Chill
Bake the cheesecake in a preheated oven for 45-50 minutes. Allow the cheesecake to cool completely before refrigerating for at least 4 hours, or overnight, to set.
Step 5: Serve and Enjoy
Once set, remove the cheesecake from the springform pan and slice into neat portions. Serve with a dusting of cocoa powder or a drizzle of chocolate sauce for an extra indulgent touch.
Tips for Perfect Results:
- Use room temperature ingredients for a smooth and creamy filling
- Swirl the batters gently to create a beautiful marble effect
- Allow the cheesecake to cool completely before refrigerating to set

Alternative Ways to Change the Recipe:
- Swap the espresso for brewed coffee for a milder flavor
- Use white chocolate instead of dark chocolate for a sweeter twist
- Add a splash of liqueur such as Kahlua or Baileys for an extra kick
Final Thoughts
The Espresso Chocolate Marble Cheesecake is a truly indulgent dessert that combines the rich flavors of espresso and chocolate in a creamy and decadent treat. Whether you’re looking to impress your guests or simply indulge in a special dessert, this recipe is sure to delight. So gather your ingredients, follow the steps, and enjoy every delicious bite of this delightful cheesecake!