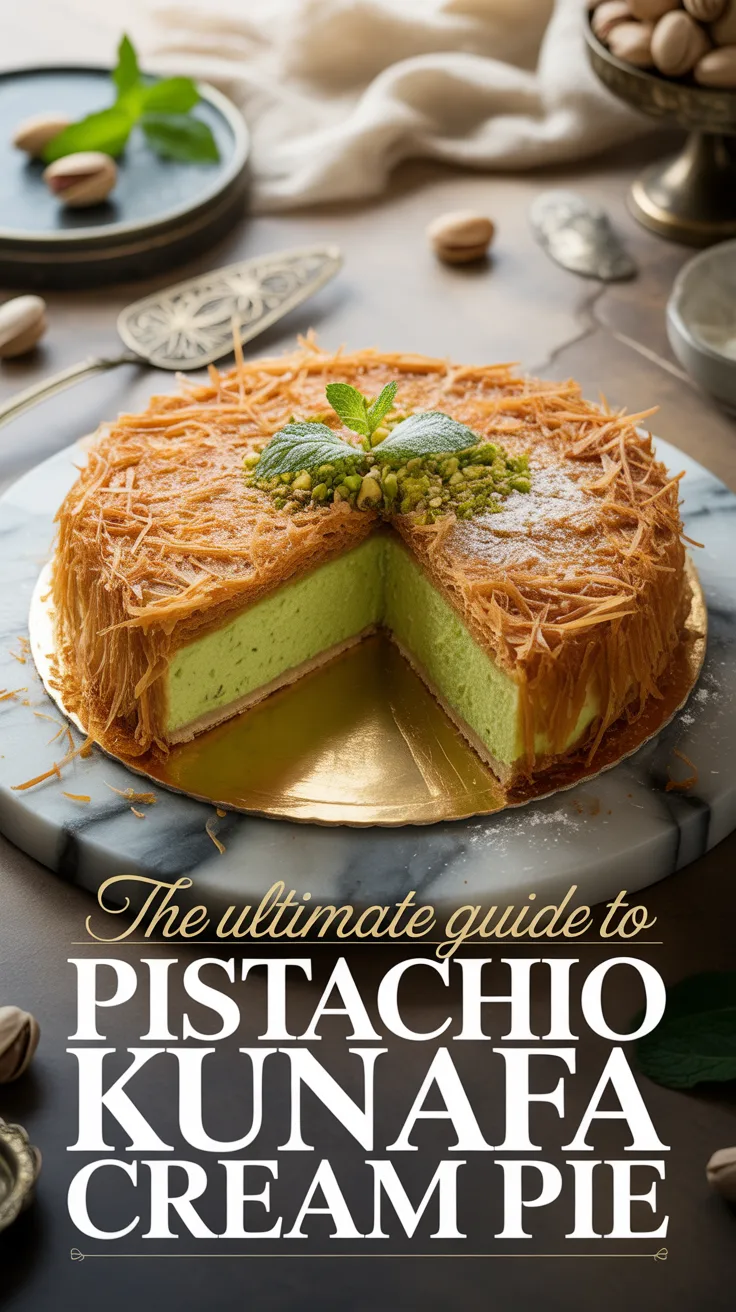
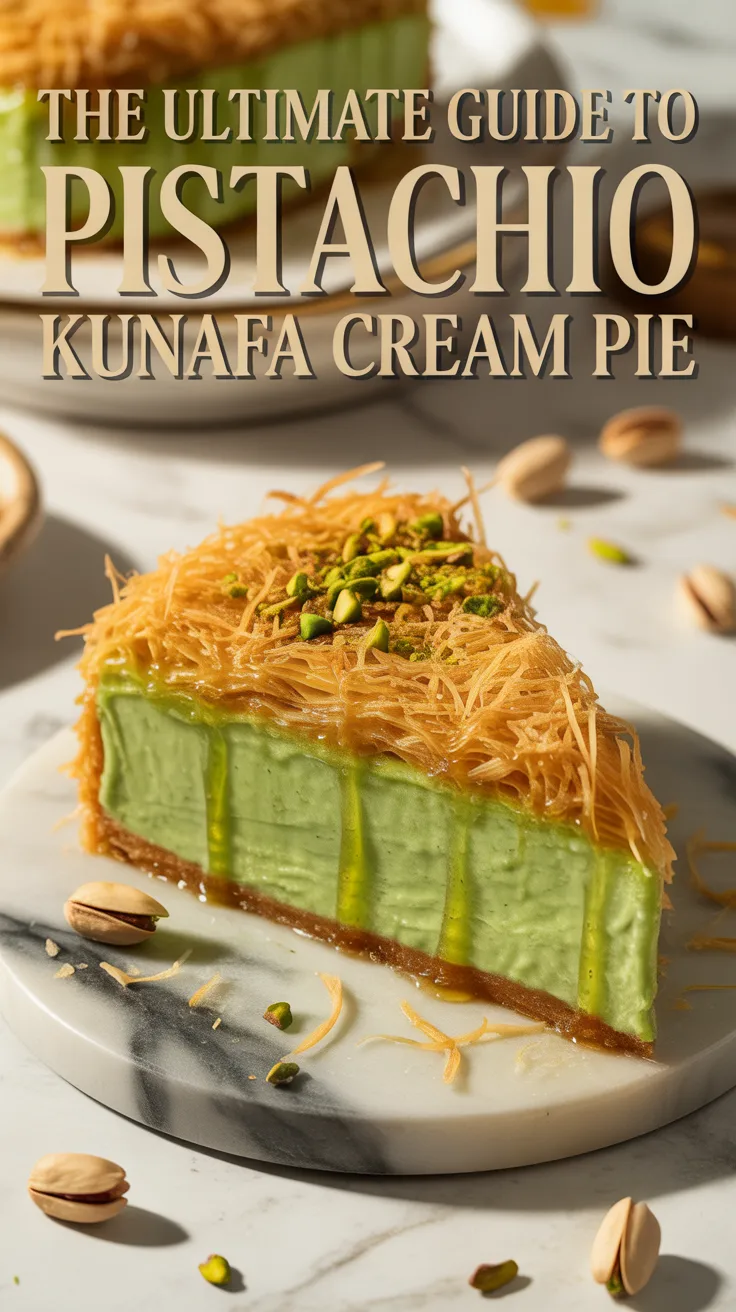
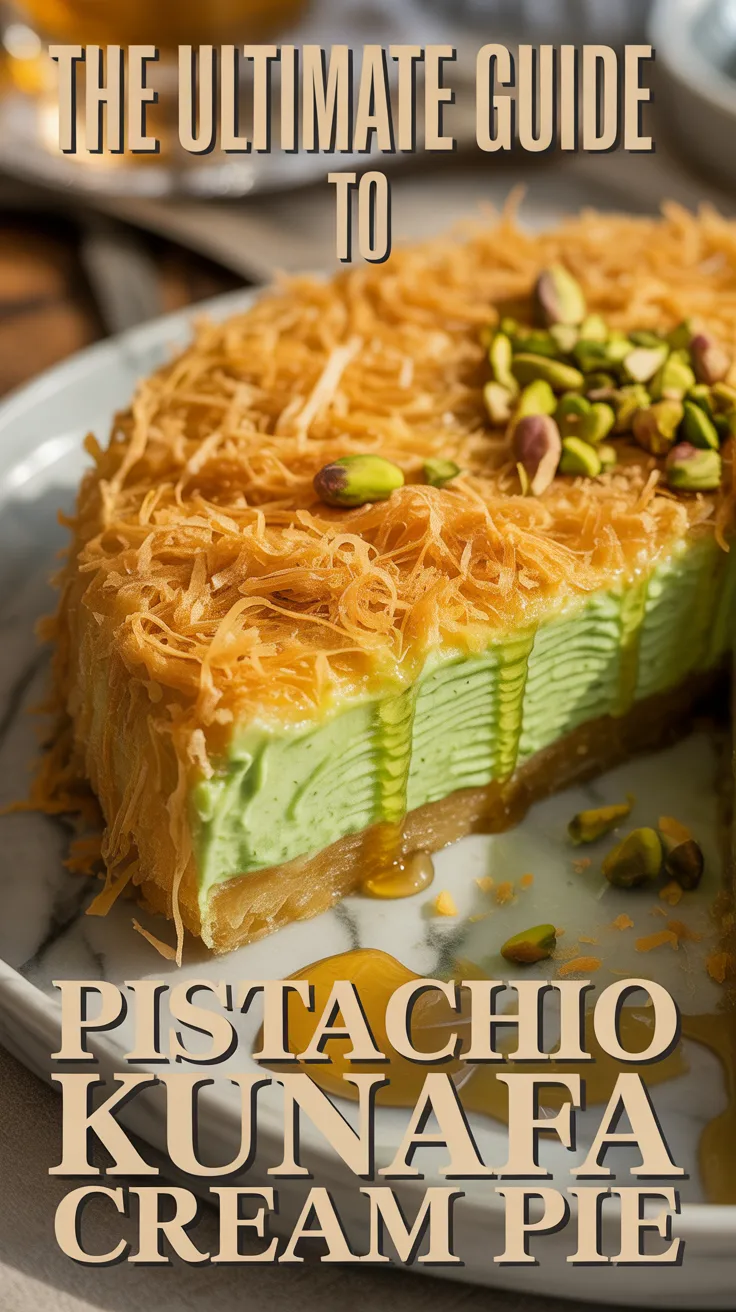
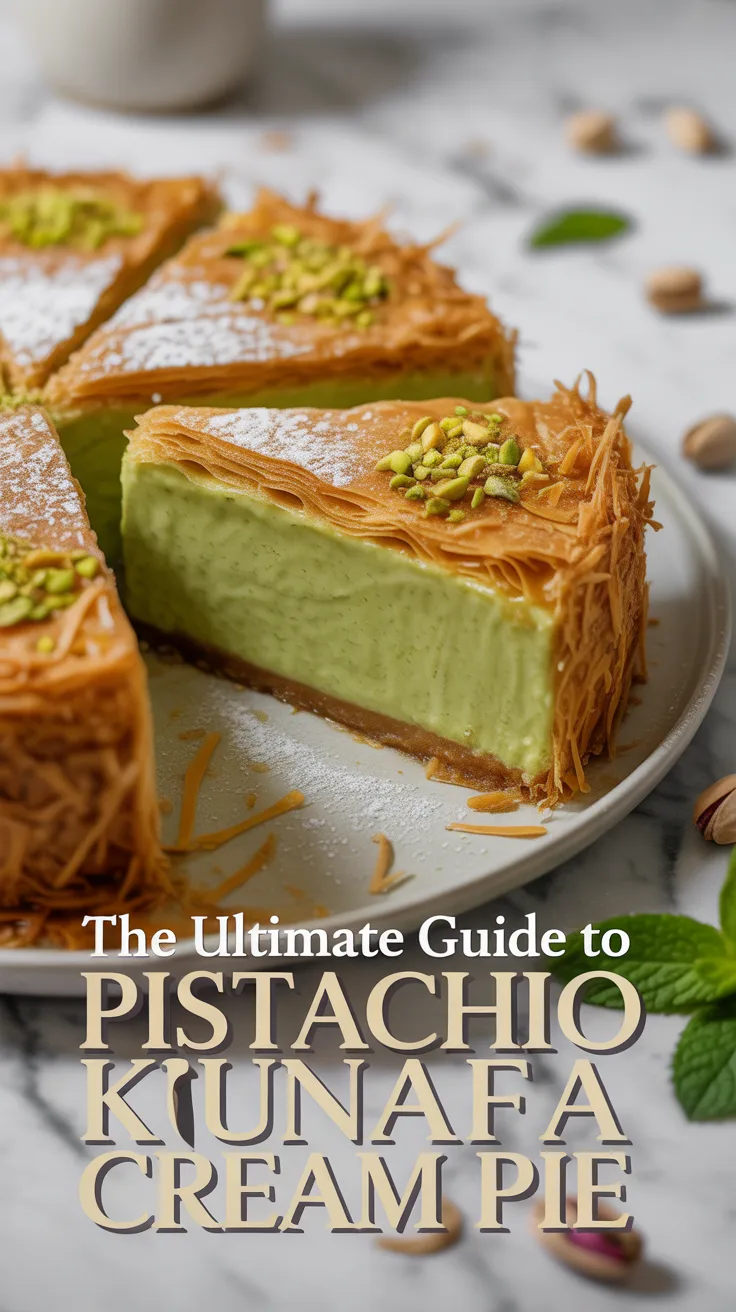
Imagine yourself sitting in a bustling Middle Eastern bakery, surrounded by the sweet aroma of freshly baked pastries. The sound of sizzling butter and the sight of golden phyllo dough being layered with creamy fillings fill the air. In the heart of this bakery, you find a decadent dessert that combines the rich flavors of pistachios, kunafa, and cream – the Pistachio Kunafa Cream Pie.
Why My Family Loves This Treat
For generations, my family has gathered around the table to enjoy this indulgent dessert. The crunchy texture of the kunafa, the nutty flavor of the pistachios, and the creamy richness of the filling create a harmonious blend of flavors and textures that never fails to impress. Each bite is a symphony of taste that brings us together and creates lasting memories.
The History and Origins of the Dish
The Pistachio Kunafa Cream Pie has its roots in Middle Eastern cuisine, where kunafa – a traditional pastry made from shredded phyllo dough – is a beloved dessert. The addition of pistachios and cream elevates this classic dish to a whole new level of decadence, making it a favorite among dessert lovers around the world.
Reasons to Make This Dish
- Impress your family and friends with a unique and delicious dessert.
- Experience the rich flavors and textures of Middle Eastern cuisine.
- Create lasting memories around the dinner table.
Ingredients:
- 1 package of shredded phyllo dough – adds a crunchy texture to the pie.
- 1 cup of pistachios, chopped – provides a nutty flavor and a pop of color.
- 1 cup of sugar – sweetens the filling.
- 1 cup of heavy cream – adds richness and creaminess.
- 1/2 cup of butter, melted – helps bind the layers of phyllo dough together.
Preparing the Ingredients:
Before you begin assembling the pie, make sure to chop the pistachios and melt the butter. This will make the process smoother and ensure that all the ingredients are ready to go.
Cutting Techniques:
When cutting the phyllo dough, use a sharp knife to create clean and even slices. This will help the pie bake evenly and create a beautiful presentation.
Kitchen Tools Required:
To make the Pistachio Kunafa Cream Pie, you will need a mixing bowl, a baking dish, a sharp knife, and a pastry brush. These tools are essential for preparing and assembling the pie.
Temperature and Timing Guide:
Preheat your oven to 350°F and bake the pie for 30-35 minutes, or until the phyllo dough is golden brown and crispy. This will ensure that the pie is cooked through and has a perfect texture.
Common Issues and Solutions:
- If the pie is browning too quickly, cover it with foil to prevent burning.
- If the filling is too runny, add a bit more sugar to thicken it up.
Instructions:
Step 1: Layer the Phyllo Dough
Start by brushing melted butter on the bottom of the baking dish. Layer the shredded phyllo dough on top, brushing each layer with butter as you go.
Step 2: Add the Pistachios
Sprinkle the chopped pistachios over the phyllo dough, creating an even layer of nuts for added flavor and texture.
Step 3: Prepare the Filling
In a mixing bowl, combine the sugar and heavy cream to create a creamy filling. Pour the filling over the pistachios, ensuring that it is evenly distributed.
Step 4: Bake the Pie
Place the pie in the preheated oven and bake for 30-35 minutes, or until the phyllo dough is golden brown and crispy. Allow the pie to cool before serving.
Tips for Perfect Results:
- Make sure to brush each layer of phyllo dough with butter to create a crispy and flaky crust.
- Allow the pie to cool before slicing to ensure that it holds its shape and doesn’t fall apart.
Alternative Ways to Change the Recipe
If you’re looking to switch things up, you can try adding different nuts like almonds or walnuts, or even experimenting with different fillings like chocolate or fruit compote. The possibilities are endless, so feel free to get creative and make this recipe your own!
Final Thoughts
The Pistachio Kunafa Cream Pie is a delightful dessert that combines the best of Middle Eastern flavors in a decadent and satisfying treat. Whether you’re looking to impress your guests or simply indulge in a sweet treat, this recipe is sure to please. So gather your ingredients, follow the steps, and enjoy the delicious results of your labor. Bon appétit!